CHEETAH3D - MY BEST SOLUTION

This is the final part of a five part Series on importing 3D models to create Character Material in CLIP STUDIO COORDINATE for CLIP STUDIO PAINT and MANGA STUDIO. Here is the table of contents for this series:
After reading good things about Cheetah 3D in regards to it’s FBX support, and the fact the software was on sale (not that it’s unaffordable even at the regular price of $99) I decided to get it. Am I ever glad I did!
You can get your copy directly from the publisher here: http://www.cheetah3d.com/order.php, or you can buy it through the Mac App Store.
I pulled in the sample model of the assembled girl and then deleted the head and hair, went to File > Export and selected FBX format. Bam! I had a body with the armature intact. Hit undo to get everything back, this time I deleted the head and body - leaving the joint armature in place and exported again. Now I had my hair model. Once again with undo and this time delete the hair and body, export just the head (and joint armature).
I should probably mention that this delete and undo method is because Cheetah 3D does not have an “Export Selected” option. This was just for testing purposes. In practice you’d probably want to save the complete model as “body,” “face,” and “hair” and then delete everything except the content corresponding to the name and save - to avoid accidentally overwriting your full model.
Then I opened up COORDINATE, pulled in each piece, and they worked! It doesn’t seem to matter that the head and hair had the ENTIRE joint armature attached to them - COORDINATE appears to merge any bones with the same name and hierarchy. Next I altered the model. I gave her crazy long “elf ears” and selected polygons in her vest and skirt to replace them with other texture materials. Again the exported parts imported and functioned in COORDINATE perfectly.
Skeleton Transplants!
There is, thankfully, a manual the defines Celsys’ “Standard Bone Specification” (included with the translated User Guides) defining what the exact names and hierarchy of all the bones has to be to work with COORDINATE. Which is great if you want to build your own from scratch, but why bother when you have a model you can use a base? I simply transplanted the entire skeleton from the assembled girl model, adjusted it to fit my own character mesh bone lengths and joint positions (which is far, far more freedom of adjustment than the rigging tool within COORDINATE offers), then told Cheetah3D to bind the modified skeleton to my new mesh (this is a critical step - forget to “bind” and your model won’t be pose-able). The model imports into COORDINATE with no issues, and when set as a Material in CLIP STUDIO PAINT it properly adopts any poses you drag onto it as well.
Cheetah 3D also has some nice UV Unwrapping tools in it and can export the maps to PSD so you can construct the “Expressions” file for your character that can be imported to COORDINATE.
Unfortunately for Windows users Cheetah 3D is only available for Mac OS X. But it is the only affordable software I’ve found that actually gives you some kind of a workflow from modeling your own, original characters to having fully featured Character Material inside CLIP STUDIO PAINT. For Windows users I’ll give you a hint, it would be FAR less expensive to buy a Mac Mini and Cheetah 3D just for character modeling than to buy a single license to Maya on Windows. You’d be THOUSANDS of dollars ahead.
Meet Ultra Grunk, the Super Caveman
For my next testing I decided to try and build a 3D Character from scratch and see how that goes. It was as much to learn how to do it, and learn how to use Cheetah3D as it was to create a character. So my first step, of course, was sketching the character. I was planning to do a direct comparison with sketch-based modeling so you’ve already met a wonky version of “Grunk The Caveman.” Well this time I was going to be building him from scratch and, after seeing how messed up the sketch-based modeling version was, I was pretty confident THIS version of him was going to be a lot better. But “Ultra Grunk” started from the same humble beginnings - a quick pencil sketch:
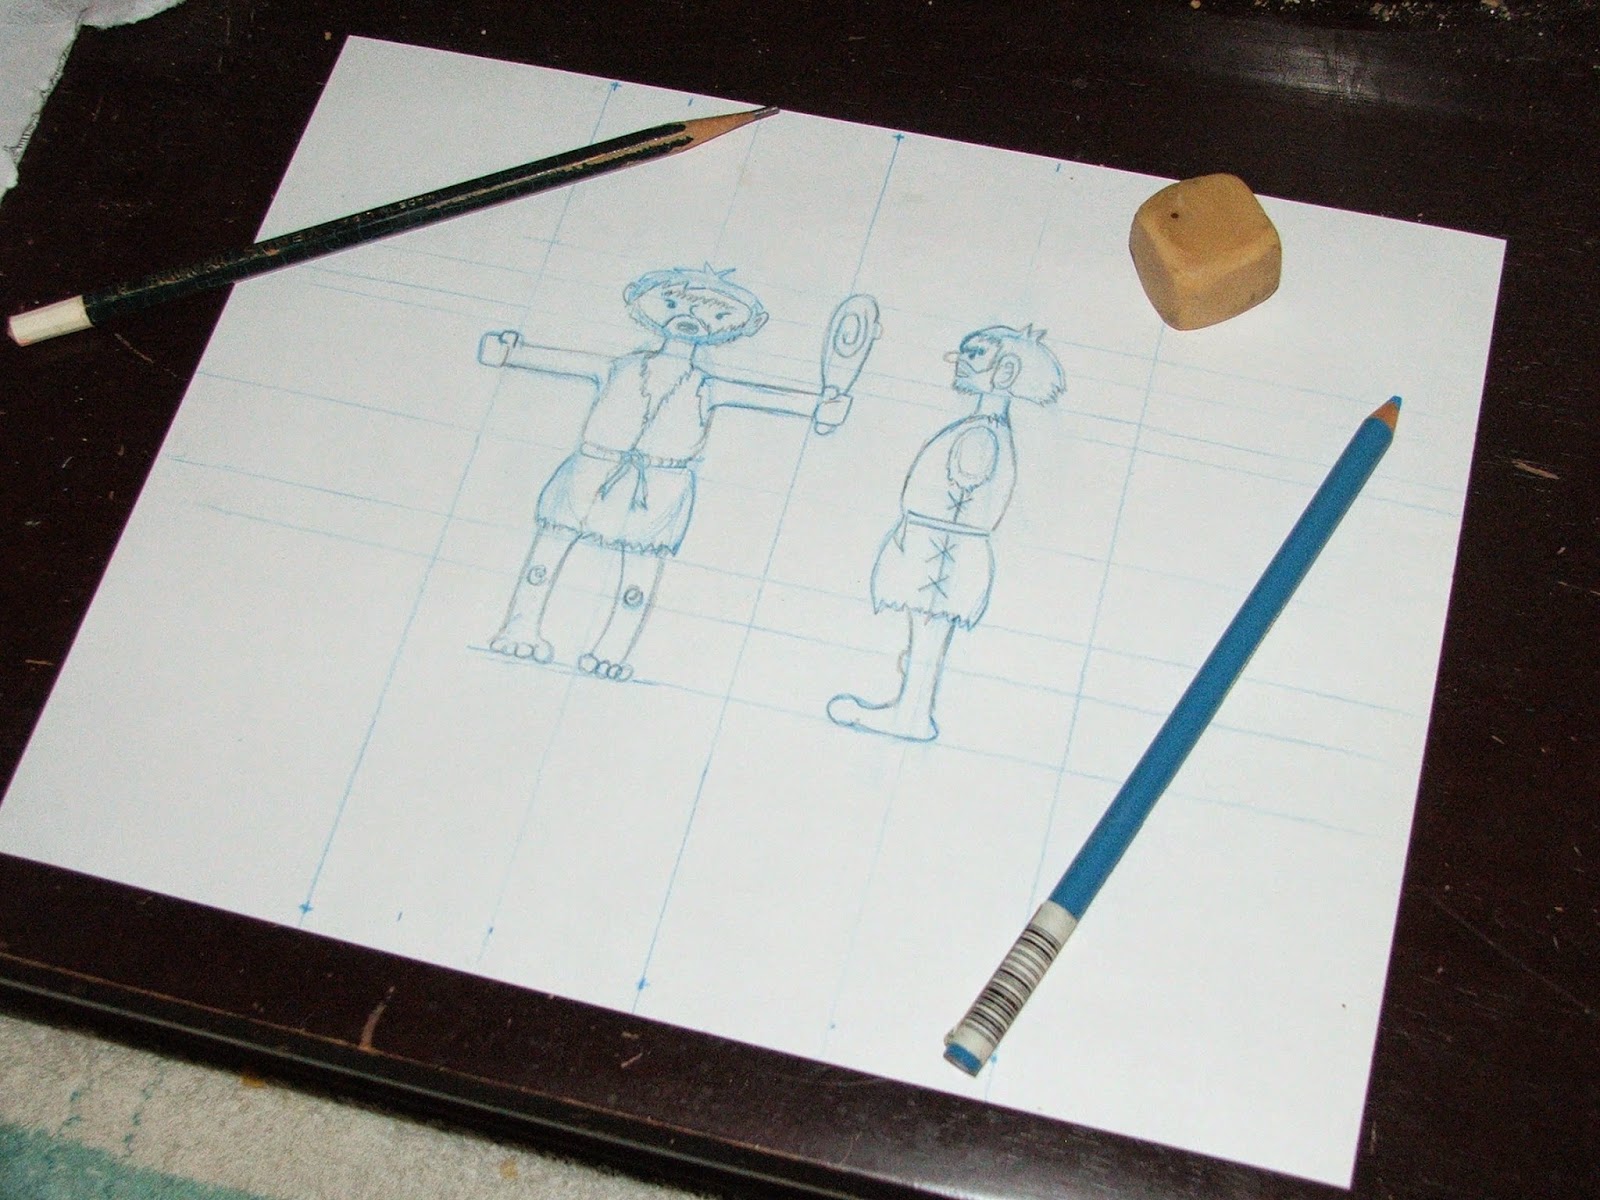
Here’s how the sketch scanned in:

Then I inked him in CLIP STUDIO PAINT

Colored Him:
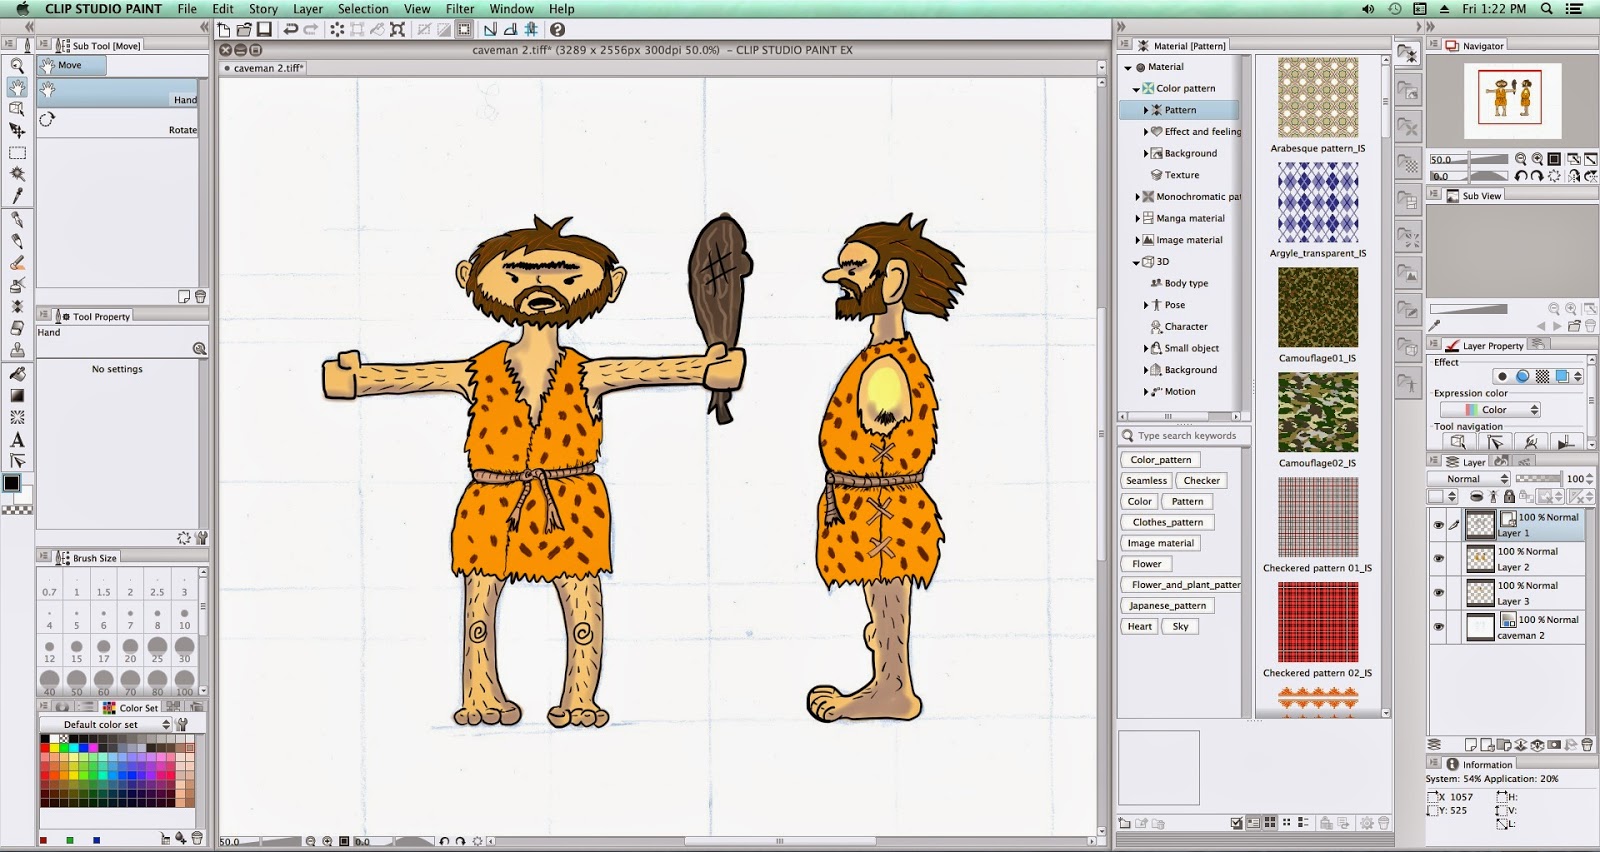
And finally finished him up with complete orthographic views suitable for the six faces of reference images, but in Cheetah I ultimately only used four of them. The Top and Bottom views didn't prove very useful.

Here is Ultra Grunk starting to come together. Here I’ve started with cylinders, capsules, spheres, and a torus for his belt - then reshaped the mesh, and for this screenshot some of his body already has subdivision applied to smooth him out a bit.
Here is Ultra Grunk starting to come together. Here I’ve started with cylinders, capsules, spheres, and a torus for his belt - then reshaped the mesh, and for this screenshot some of his body already has subdivision applied to smooth him out a bit.

And here is Ultra Grunk in finished form - complete with a transplanted skeleton:

You may have noticed the the finished Ultra Grunk didn’t have his club in hand. Well that’s because I decided to make that as a separate model and set it as an “accessory” in COORDINATE. Which worked just like it is supposed to, so now I can choose whether to show him with or without his club in ham-fisted hand. The final step was dropping him into a page in CLIP STUDIO PAINT and applying the same “Funny Run” pose as the previous version of him:

Now, I’m not trying to say that this Grunk model is any good. It is literally the very first time I ever tried to build a 3D character model from scratch, and I did it in a program I’d just purchased and was building this model to learn how to use it. But the point is it worked, it demonstrates that your models don’t have to look like Anime/Manga style - they can look like stupid cartoon characters if you want.
Which is why I’m saying that, as of right now, for those of us outside of Japan the best path - in terms of functionality and affordability - to get original models into CLIP STUDIO PAINT or MANGA STUDIO is to build and rig them in Cheetah 3D.
Note: The current version of CLIP STUDIO MODELER (1.0.1) does now have some character creation tools in it. There are not yet translations available for the software but I have run the User Guide through Google Translate and if and whenever English-speaking people can use it (officially or unofficially) it may present another affordable and viable option for original model creation.
UPDATE: AUGUST 2016
Because numerous people have contacted me asking for the source materials for Grunk I am (somewhat reluctantly) now providing them along with the other Grunk-related materials I created as part of one of my experimental Custom Materials Packs.
Here is a quick "cover" I threw together showing all the elements in the Grunk pack:

←PART 4
UPDATE: AUGUST 2016
Because numerous people have contacted me asking for the source materials for Grunk I am (somewhat reluctantly) now providing them along with the other Grunk-related materials I created as part of one of my experimental Custom Materials Packs.
Here is a quick "cover" I threw together showing all the elements in the Grunk pack:

"Grunk is home owner now!"
←PART 4
18 comments:
Hello, thank you for the nice post, helped me a lot since I was with the same problems
What a I want to know is:
1- Wich one is best? Maya oh Cheetah?
2- The models edited on both keep the Joint rotation limits (bone constraints)?
3- How to activate the bone constraint in Manga/Clip Studio?
4- I prefer work on Pose Studio(PS), is much ligt than CSP/MS, and have the Joint Constraint Option
but PS don't recognize the CSC extension, could you make a tuto how to merge all the parts in
Cheetah/Maya to export the complete model in .fbx so I can use it on PS?
Maya is really complex and very, very expensive. Does that make it better? I don't know about that, but I can't afford it (I only played with the trial version until it expired). I went with Cheetah3D because it was an affordable software that can work with FBX format models with joints and it's fairly easy to use.
I haven't used Pose Studio. I was more focused on Clip Studio Coordinate. It has the facility to add the joints to a static model, and you can turn off the constraints, and import and register poses associated with that character model. I haven't gone deep enough into it to know if you can set or edit the constraints or not. Coordinate simply imports a FBX model and then you can add other models for different clothing, hair, accessories, and set poses and facial expressions - so a CSC file is NOT just a model, it's a collection of model and other data files. And once you save it the only program that can open it and edit it is Coordinate and you can't even export the component parts or poses. So you can forget about trying to extract a model from a Coordinate format file and use it elsewhere.
But Coordinate has the same starting point as Pose Studio, you import an model (preferably FBX format with bones). Exporting from Cheetah3D is easy, it's just "Save As" and select "fbx" in the dialog. If you "transplant" bones from another model there is another step you have to do to merge the bones with the new model (I cover that Part 3 where I talk about "Skeleton Transplants" and how you have to "Bind" it with the new mesh).
I'm guessing Pose Studio probably uses the same bone structure and naming conventions as other Celsys programs? I know if you are using non-standard joints in an FBX model you can't get it to adopt poses dragged onto the model in Clip Studio Paint, which is why I started transplanting the bones from known, good models into other meshes. If you needed to construct the joints from scratch, though, take a look at the "Standard Bone Specification" manual I ran through Google Translate (unless you can read Japanese, in which case read the original). I believe you can set up joint constraints in Cheetah3D by applying the "IK Constraint" tag to the joint (though I'm still not sure quite how it works, I'm pretty new to 3D modeling software).
In Manga/Clip Studio there is a checkbox labeled "Joint Angle Limit" in the Pose Tool Palette (you can also show it when you have a character model selected by hitting the "wrench" in the bottom of the Tool Palette and then the "Pose" subsection). I don't know if the model has to use the Celsys "Standard Bone Specification" or it any skeleton with "IK Constraints" will obey the "Join Angle Limit" when it is checked. I know with models that use the Standard Bone Spec checking that box will, for example, limit rotating a character's leg at the knee to the normal direction, while unchecking it allows you to rotate it the wrong way and even intersect it with the characters body.
There's a student license for Maya (it's like a 3 year trial, lol), It's the best option for me 'cause I can't afford a license or a
macbook (and have no interest in buy one)
and I just realized that CSP/MS even not showing the Join alngle limit they are there! (my inattention :P).
Pose Studio is the Stand Alone pose software of CSP/MS so they probably have the same convention
And I'm a noob in 3D so unless you have a step by step, I'll be completely lost abot 'binding' and 'transplanting',
I have the demo models here and the CSC merges the parts perfectly, but I would like to know how I could do this
In another program, I have a head with bones and a body with bones too, and I want to know how merge these 2 groups
to form a complete character like CSC do.
Btw, Thanks for the attention =)
My Maya trial expired so I can't post any step-by-step screenshots. But in "Part 1" I explained that you can't use Maya's "soft mod" deformers, because even after you delete the deformer history to "bake" your mods into the mesh, it does something (what I don't know) to the model that makes it unusable in the Celsys programs. So your only option is to manually modify the mesh by selecting vertices and using the manipulator to push them around. As for models with bones in them, if you don't plan to swap heads (for different hair) or bodies (for different clothing) you can get away with using one mesh with one "skeleton" of joints inside it.
You only need separate body and head models if you plan to swap out those parts and build a "character file" in CSC. Each part (head, bodies, hair accessories) has to include it's own skeleton adhering to the "Standard Bone Specification". In my experience I got the best results if EACH component's mesh was bound to a complete skeleton - in CSC all the separate skeletons are merged into one. That actually "attaches" a head to the body in CSC instead of allowing them to move independently on separate skeletons (as is the case when importing a model with a non-standard skeleton, for example, the ones I pulled in from DAZ Studio where the head and body had independent skeletons because they were non-standard joints and CSS couldn't merge them).
A secondary question I guess I have is whether you'd need to pull the character models into Pose Studio at all? Can Pose Studio export pose coordinates for use in Manga/Clip Studio Paint? Because if your ultimate goal is to have a library of custom poses you can drag and drop onto character models in MS/CSP and have the character adopt that pose, what you're REALLY after is some way to register those custom poses in the Materials Palette. Technically (though it's sort of a pain) you can create those poses IN the MS/CSP app itself and "register" those poses to your Materials Palette for later, general use. I believe Clip Studio Action can also create, export, and register poses.
CSC has an option to "Add Pose" which opens a file dialog apparently looking for the Pose file "export" from CSA. If Pose Studio has an "export" option for the pose it may be compatible for importing, assuming Pose Studio uses the same "standard bone spec," coordinate system, and pose file format.
Poses you create or modify in CSC cannot be exported. As I mentioned before, NONE of the components of a CSC character file can be extracted or exported for separate use in other apps. Presumably, however, if you created the character file you would already have the original FBX models, PSD textures, and pose files from which you constructed it. Once a character file is "registered" as a new Material it is obfuscated in a way that means it cannot be opened or edited. In Japan, Celsys has an online marketplace where people can sell their original creations - but what they sell isn't the editable CSC file, it's the obfuscated "registered" material - ensuring nobody can extract the components or modify it or build their own version of it to sell.
Also poses imported to a CSC character files are poses JUST for that character! Which is fine if they have weird anatomy like extra arms or a "signature" pose they strike, otherwise I'd think most people want general poses in the Materials Palette that can be applied to multiple models, and making those doesn't involve CSC at all. What you make and how you make it will depend on whether you just want custom poses, or if you just want custom character files, or you want custom character files with custom poses.
I have no problem pushing vertices around, I even prefer this way; I wanted separated bodies and heads
so I can make lots of characters by combining bodies/heads and keeping them in the .fbx format (to use in PS)
But I realized that I can work better in CSP than in Pose Studio so I'm giving up this idea but I think
it's important to know how to do "advanced" (advanced for me :P) edition in 3D objects 'cause all knoledge
is worth, and since I have the original .fbx files I can just edit them and make a final .c2fc file
The characters handled by pose Studio are the same handled by CSP/MS (with the exception of the .c2fc files)
I don't know it PS can Export anything else besides compelte scenes (the .lip from MS)
I had no luck using Blender (who gives me a minimum capability of edition) to merge bones and meshes
(especially because I didn't knot whatahell I was doing) I had the same problems with the hair and head
slipping out of the body but I worked around merging all the parts in one single mesh
(the body who already had the skeleton and the head and hair whose bones I simply deleted)
this operation made the model (exported in FBX) work perfectly in PS and CSP/MS but the only
problem is that this action wiped the texture and the body was in blank (thats the only problem)!
I tried to solve this by merging the skeletons instead of deleting the head bones and meging body+head
into one mesh, but the head slipped out of the body or the skeleton was binded only to the head atc...
So, as you can see I kinda solved the problem pretty easy but sacrificed the texture that's why I came to
ask you about some help/direction on how to properly merge the skeleton instead of this crazy but good workaround
PS 1: The native importer/exporter of blender (latest ver. 2.74) imported the bones rotated but the model
exported was completely funtional and the only bug was a duplication of the bones in the extremities
(finger tips, tiptoes, head, and hip - just deleted the doubles)
PS 2: Not all the .fbx format blender can read, so I used the online 3D editor Calra.io, it's a free and easy to
use web based editor, and to import textured .fbx just select the .fbx and the texture image
(yes, it supports multiple upload).
"that's why I came to ask you about some help/direction on how to properly merge the skeleton"
As I said above, if you bring in a mesh of a head sitting atop a "Standard Bone Spec" skeleton, and you also import a body mesh bound to another standard skeleton, CSC will merge the two skeletons so the head moves with the body instead of independently. But this ONLY works if the skeleton's joints conform to the Celsys standard. If the joints don't conform to their standard CSC won't merge them (and then you get a head that moves independently from the body, because they are separate meshes with separate skeletons, they just happen to be intersected with one another).
Blender has a notoriously large learning curve because of it's very complicated user interface. I also didn't have any luck working with FBX models with joints and given that Autodesk owns the FBX format and it isn't under a license friendly to open source projects, the Blender developers have to "reverse engineer" it. I thought it made a lot more sense to just use a commercial modeling program that can just pay Autodesk for the FBX license and offer proper support (which is how I ended up buying Cheetah3D).
As for the missing textures, MS/CSP is apparently picky about the textures being in the same directory as the model. So you have to put the FBX and textures in the same folder, ZIP them, and drag and drop into MS/CSP. For OBJ files you have to also move the files out of the texture subdirectory and edit the MTL file to point to their new location. Not sure if you've seen this blog yet or not, but this is what got me going experimenting with all this stuff: http://surfaceproartist.com/blog/2013/8/18/ot-3d-basics-for-manga-studio
Of course, zipped models dragged and dropped into MS/CSP aren't registered as materials. If you want your character models in the Materials Palette you have to use CSC to "register" them (and if, like me, you're using the official English version of CSP, you have to find the numbered folder for the registered version of the model in the [Documents/CELSYS/ClipStudioCommon/Material] folder and manually copy it to [Documents/CELSYS_EN/ClipStudioCommon/Material] folder).
Unfortunately, since I wrote up all this stuff on my blog I haven't had time to work with any of this again. :/
As I said above too, I know about the skeleton specification and all, what I wanted to do is to manually perform
the merging without the need to use CSC, because the CSC only saves a format that Pose Studio can't read
(but as you know, I've already gave up this, and decided to move definitely to CSP/MS).
And as I said before too, what I have is the curiosity to know how it work for all knoledge is worth;
let's say I want more detailed Eyes so I go to make eyeballs (with bones) and a pair of glasses (with bones too)
or have an already rigged animal tail to be merged, so the primordial question still remains: how to merge skeletons
(not merging meshes 'cause it will wipe the texture and bugs the skeleton) of material strange to CSC
so CSC wouldn't handle these mergings because they wouldn't be in neither of any of the default categories
(body, face, hair, acessories), so I would have to perform the merge somewhere else.
Got It? =]
And about the textures, they were in the same folder all the time and working fine on the meshes (head and body) until
I merged them, the new mesh didn't recognize the textures of what was previously 2 meshes
And yeah, I had already read about this blog because I had read all your 5 posts.
I did an experiment with one of the sample models where I added a "tail" to the body mesh by extruding part of it and then added two joints to it extending from one of the "standard bone" spine joints. My non-standard joints imported to CSC just fine. As long as you are extending the "standard" skeleton and building off the end of some standard bone, I think additional joints should work. At least when I tried it and imported a "face" (actually it's a head) atop the modified body - at which point CSC was merging two skeletons - it retained the unnatural joints I'd added to the spine. Technically the face/head doesn't have to have the full skeleton under it, it only needs "head_bb" and "head_end_bb" - I just found it easier to put it atop a full skeleton to get it in the right place (but you can always position it in CSC instead). CSC will merge whatever standard bones have multiples.
The other option would be create separate meshes with their own joints and import them as "accessories" and then "bind" them to one of the existing, standard bones. If you downloaded the sample models, the "rabbit ears" for Girl A are like that. When you first add them as an accessory they're just laying there on the "floor" sideways. You have to go into the CSC "Setup" panel and "Attach to" the "head_end_bb" bone. That's also how the hair ribbons and GUMI model's goggles and helmet are done.
As for pose-able eyes (like DAZ studio uses) I don't see why that wouldn't work as long as the head mesh left holes for them and they were "attached to" the "head_bb" bone so they moved with the head. I don't think it would matter if they were attached in your modeling program or attached as "accessories" in CSC (other than the latter makes them optional/swappable).
In short, I think once you have imported a body mesh that has the "standard bone" skeleton in it, you should be able to attach pretty much any other jointed model to it as an accessory. If it's part of the model's anatomy (say, they have four arms) that should work too, again if the new arm joints are simply attached to an appropriate standard "spine" bone. Obviously these extra, unknown joints won't adopt standard poses dragged onto the model, so that would be a good reason to have custom poses bundled with the character file.
I don't know what to tell you about the textures. All I know is the Celsys programs are picky about the image files being at the same root level as the model in the folder and I think they have to be JPG format.
Ok, thank you, Consider making tutorials on Cheetah, about the basic, (bind mesh, textures, skeleton transplant...)
I think the most important part of a character is the head, nobody will notice small diferences in body shape
unless that you have superdeform characters, so I'm trying to figure out how transplant the head of a model in .xna format
(ripped from a game, check out the deviantart galeries for more) to use in an average fbx body base that I had extracted
from one of the Celsys demo girls
this ( http://prntscr.com/8aq3ie ) who had the body complete under the dress, the others don't have the body complete.
This didn't opened in Blender so I used Clara.Io to open and delete the dress + its bones, and the exported fbx fortunately worked on Blender
Check out XNALara on DeviantArt too, there's characters, scenarios, acessories, etc...
This is just one of hundreds of galeries -> http://xnalara-customized.deviantart.com/gallery/
I believe there is an importer for Blender to bring in .xna meshes, then you could export them as .obj or .fbx and to transplant it onto a body with CSC you just need to import the body under the "Body" tab, then the head under the "Face" tab. If .obj you'd need to rig with (crappy) rigging tool in CSC. Otherwise if you bring in as .fbx with rigging, so long both models are using "standard bones" CSC can merge them - as soon as they merge the head transplant would be complete. Import multiple head and body models so you can mix and match.
I haven't had much success combining heads and bodies in Cheetah3D because if I merge the meshes and bind the bones it's like a hollow rubber doll - if you try to rotate the head it just twists the mesh around the head bone like it's wringing out a washcloth. I haven't figured out yet how to make it pivot properly since it's easier to just import the parts to CSC and let it take care of that for me.
Yes, there's a robust importer which creates a tab in the tool shelf, with options such import/export xna files and poses, see textured material without light shading, etc...
About the transplants, I imported (on Blender) a xna head, and one of the girls head (from the demo models), then I deleted the girl head leaving the bones, and brought the xna head atop and bind to the bones, exported all as fbx, when I import only the head is ok, but when I import the body the head disappears!
About the merging in Cheetah or another program, I prefer to leave this work to CSC, I only want to bind my customized head to the head bones and export it all to the CSC, seems pretty easy so I don't know why this is not working
So when you transplanted the head and bound it to the bones it was still a separate model (i.e., not merged with the body mesh)? CSC expect the imported objects to be single meshes, so one for the "body," another for the "face," etc.
Open the demo girl and delete her head, bind bones, export as your "body" model for CSC.
Open the demo girl again, delete the body and head but leave the bones, import your new head, position and bind to the bones, export it as your "face" model for CSC (technically you only need the "head" bones, but CSC doesn't care if you leave the rest of the skeleton under the head and it saves you the step of deleting most of it)
Import the body into CSC. Now import the head as a "face" into CSC. It should merge the two skeletons so the head moves properly in relation to the body. Import as many head and body models as you want for swappable parts for the character.
I binded the head but it still bugs and I don't know exactly what happens, So I tried to trick CSC, I imported the
demo Head, and in edit mode deleted 99% of the mesh, leavin only a patch in the chin area, then I imported
my .xna Head and merged with the chin patch. When I opened my creation on CSC it only showed the small
square, the rest of the head wasn't there! It was like the transplanted head was invisible!
So I gave Up this transplant and right now I'm having a lot of hard work editing a demo head, cutting and
editting faces and after this I will unwrap the edited head and apply my texture @-@
I assume you're binding and merging in Blender? If you're able to do anything with the bones I have to ask what version of Blender and the FBX importer/exporter you're using because (at least on my Mac) I've never got them to work properly, which is why I bought Cheetah3D.
As for the merge not working, it sounds like you haven't actually merged the separate objects into a single mesh (and CSC absolutely seems to require importing a each part as a single mesh). Again, assuming this is in Blender, I believe the CTRL+J "Join" is actually more of a "group" than a "merge" because you can easily separate the pieces again, whereas if they were actually merged you'd need to cut vertices to separate them. In order to turn them into a single mesh you have to go into Edit Mode and select vertices to merge, which will actually super-glue the objects together into one (I think it's ALT+M?). If you applied any modifiers you'd probably also need to Object -> Convert To -> Mesh to bake them in. Sorry, it's been a while since I did it in Blender.
All that said, though, you shouldn't actually *need* to merge your imported head mesh with any part of the Celsys demo model head mesh in the first place. You really just need to bind it to the "head_bb" and "head_end_bb" bones and export it as an FBX with bones (open one of the demo model heads or bodies, delete the mesh but keep the skeleton, import your new head, position it, bind to the bones, export as FBX with bones, import it into CSC, and reposition if necessary). CSC should automatically "transplant" it for you onto any body model you've imported that also has the Standard Bones.
If that isn't working for you and you're using Blender I'm just gonna say it's probably because Blender's FBX importer/exporter sucks and it's screwing something up in the conversion. I had a terrible time with it stripping out bones or rotating them oddly relative to the mesh - there's a reason I gave up on using Blender for this and bought a program that can just pay Autodesk the license fee and properly support FBX models.
I'm using the latest version of Blender (2.74) and as I've said before, I'm using the native importer/exporter because the
importer you used in your post messed up the exported fbx, the native imp/exp works fine,
About the rotated bones, I think it's just a visual problem because when I export the .fbx the bones are all in the right
place and orietation
Ok, so I tried to make this merge in edit mode and it worked, for this example I made a face transplant
-> http://prntscr.com/8ekwcq
buuut... (There's always a "but")
The bones got dislinked and moves independently from the head
or in another case the transplanted part got all the way pinned to the ground like the "spear" in the
model in the pg 2 of your post
and I think that this may have something to do with this -> http://prntscr.com/8el7se
ok, about bindind the bones to the mesh I don't really know what i'm doing, I just selected both and hit
Ctrl+P > Make parent
And I don't have a mac, and didn't get used to maya so I returned to Blender where I know I can work well.
PS 1: this is how the Girl head is getting, next, I will Apply the texture http://prntscr.com/8ela15
PS 2: someone comented here http://offworldgirl.blogspot.com.br/p/part-1-of-making-materials-with-clip.html
PS 3: I want to show the poor quality of the mesh made by celsys by comparing with the mesh that I transplanted
and this has nothing to do with number of faces, this discontinued edges gave me a lot of hard work
to subdivide
http://prntscr.com/8elcsj
http://prntscr.com/8eldee
Ok, so you're using the Windows version of Blender. Maybe the Mac versions I have (2.70 - 2.75a) are more buggy or something, because they really seem to mess up the bones on import (oldest version), strip them out on import (middle versions), or throw a Python script error on import (latest version, but not with every FBX model, converting the models to an older FBX version sometimes helps). Which is why I pretty much gave up trying to use Blender for this, but it sounds like you're using the old "Parenting" method for binding the mesh to the armature, which I think is how CSC does it (no idea if models using the new Blender "Constraints" method would import or not). Maybe this post will help? -> http://blender.stackexchange.com/questions/5151/model-wont-follow-its-armature-in-pose-mode
And, yeah, the Celsys models have pretty simple geometry - they rely heavily on using the texture maps for detail (the simpler geometry is also probably for performance reasons, as anyone who has imported a high-polygon model into CSP can attest to the wait for it to load and the horrible lag when manipulating it).
My Blender always rotate the bones 90º relative to the mesh and some of the fbx don't import
(throw a Python script error on import ), but the exported fbx works fine with
the small bug I already said, it duplicates the bones of the extremities
(finger tips, tiptoes, head, and hip)
I got Something interesting today, since the last month (when I got my student license)
I was discouraged to work on Maya for not getting used to the interface
(I think Blender is far more intuitive and oriented to fast productivity), but I always had the
curiosity to try this bind in maya which is the "house of the fbx" so I thought that in maya I would had better results and I got courage and tested it today, the same simple parent method used in Blender to bind the head bones of a demo head to a converted XNA head worked flawlessly, and I joined the head + body on CSC and then the assembled char in Manga Studio and it worked fine as any other Celsys
model
and I think the next challenges are rigging eyes and jaw in the head and transplant a Celsys skeleton to a XNA body converted to FBX
I just updated this page with a link to a ZIP with Grunk's source materials. I also included some other Grunk-related stuff, including a "Flintstones" style house I made for him as a 3D Background material in Clip Studio Paint. I created the house model in Trimble SketchUp and exported it as a Collada model. Then I used the free Autodesk FBX Converter utility to turn that into an FBX model that I know will work better with the CLIP apps. However the house was too small for Grunk! It also got rotated 90 degrees by the conversion to FBX! So I ended up pulling the FBX into Cheetah3D and rotating back into the proper orientation and scaled it up 2x. I'm still not sure how all the "3D Background" settings work in Coordinate. I'll definitely have to play with that some more - especially considering my main interest in CSP's 3D capabilities was to use models for virtual "sets" (because I don't like drawing backgrounds very much). Anyway, the source files are now available, see what makes 'em tick.
Post a Comment